
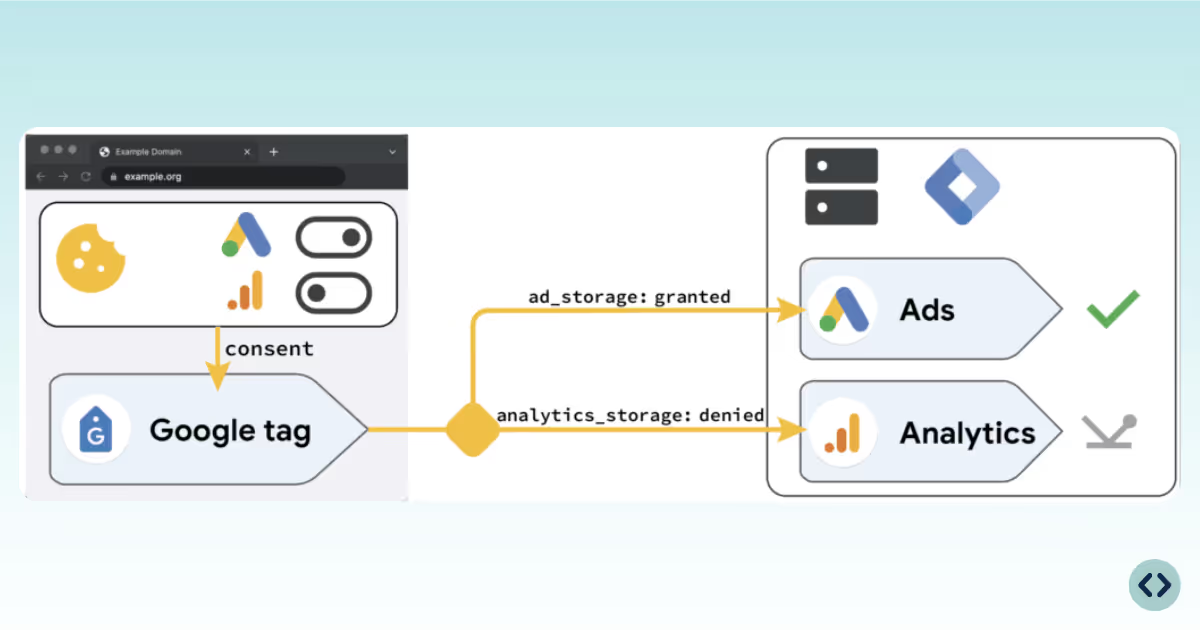
Compared to the V1, Consent Mode V2 introduces two additional consent types: ad_user_data and ad_personalization. Here is a breakdown of them all:
ad_storage
Controls advertising cookies.
analytics_storage
Controls analytics cookies.
ad_user_data
Governs sending user data to Google for ads (new in V2).
ad_personalization
Governs personalized ads/remarketing (new in V2).
Some CMPs map their categories to Consent Mode types:
• marketing → ad_storage, ad_user_data, ad_personalization
• statistics → analytics_storage
• preferences → functionality_storage, personalization_storage
Ensure your CMP passes consent states for each required category.
Download and import the Consent State Template from GitHub:
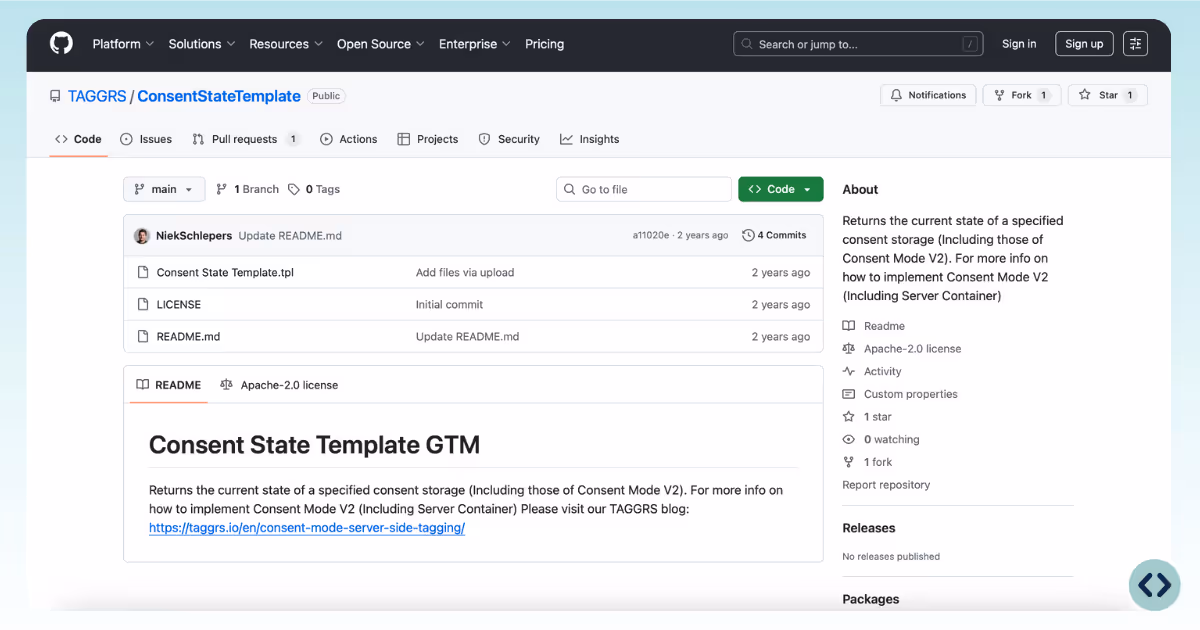
In GTM, go to Templates → New → Import and upload the Consent State Template.
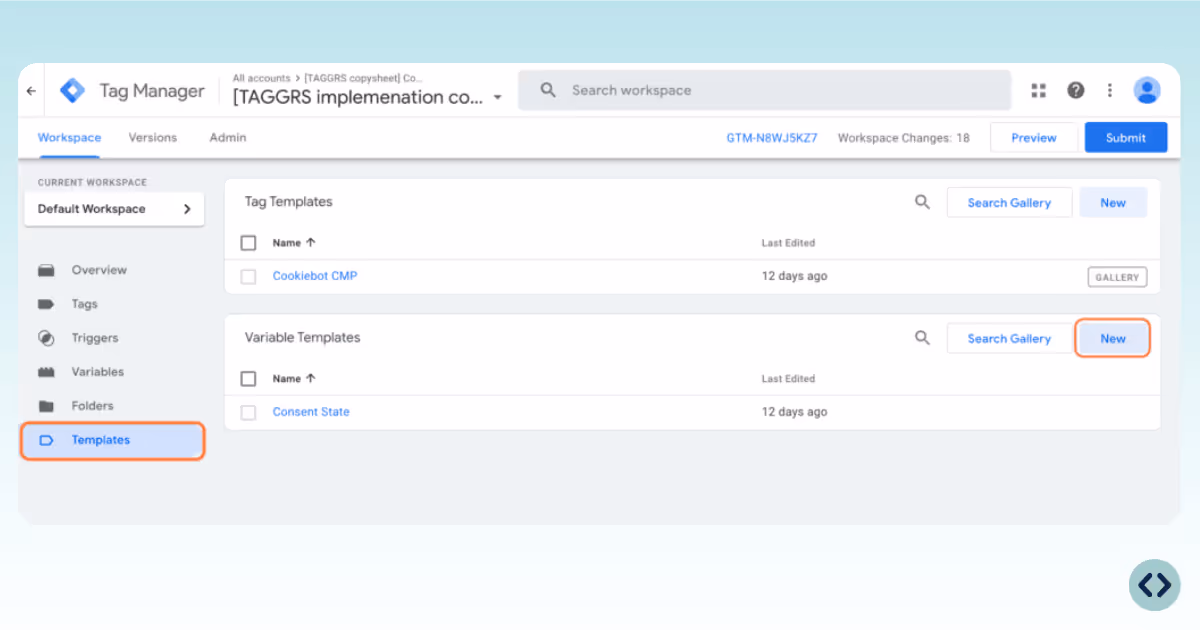

For each consent type (e.g., ad_personalization), create a new variable:
Variable type: Consent State
Consent Type: e.g., ad_personalization
Repeat for all relevant types (ad_storage, analytics_storage, etc.).
Create a new variable: Google Tag – Event settings
Variable type: Google Tag: Event settings
Add all Consent State variables as event parameters.
Edit your main Google Tag in GTM.
Under Event settings variable, select the variable you just created.
This ensures consent states are sent with every event to the server container.
For tags without built-in consent (e.g., Facebook Pixel), go to the tag’s Consent Settings.
Enable Require additional consent for tag to fire.
Select the appropriate consent types (e.g., ad_storage for ads, analytics_storage for analytics).
Create a custom event trigger (e.g., cookie_consent_update) to fire tags when consent changes.
Assign this trigger to tags that need to respond dynamically to consent updates.
For all other platforms such as Facebook, you can follow the following steps.
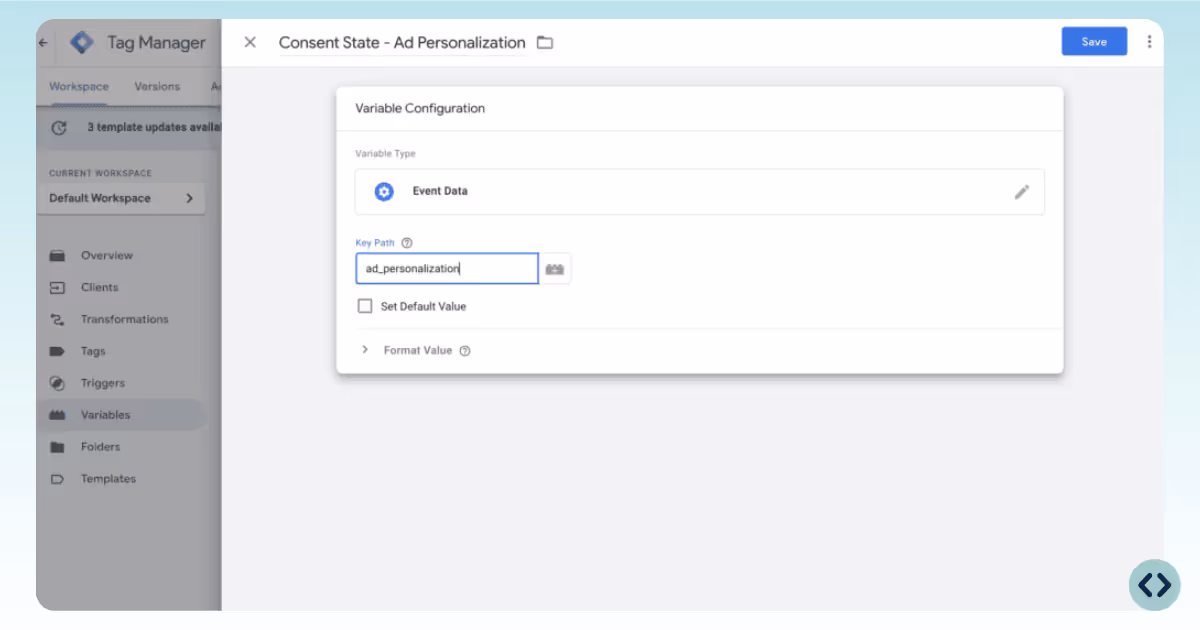
The data enters the server container from the web container by creating new variables. You need to do this for the consent states how they are sent to the server container.
We show this in an example for the consent state: ad_personalization.
1. Go to the server container and create a new variable.
2. Name it Consent State - Ad Personalization.
3. Choose Event Data as Variable Configuration.
4. Enter ad_personalization as Key Path because that is how it is sent from the web container to the server container.
5. Click Save.
You can now add Consent States variables to the tag you need. To use certain tags, it is important that marketing has been accepted by the user. If this is not the case, the tag should not be activated.
You can do this by adding the Consent State - Marketing to the appropriate Tag. Adding the newly created variable as a condition to the trigger will fire the Facebook Conversion API only when marketing cookies are accepted by the user. You can do that by following this tutorial:
This tells you that the Tag may be fired only when consent has been given for marketing cookies. This is consistent with enforcement of the Digital Markets Act (DMA).
You can then add these back to your tags. You do this again on the basis that if certain consent states are not checked then you are not allowed to fire the tags.
Now comes the tricky part. You have to determine for each event under which consent it falls. As mentioned before, in the Server Container for Google products you don't need to do any additional settings in the server container.
For example, a Purchase in GA4 falls under statistics because you use it for statistics and not for marketing purposes. So then you have to make sure that the purchase trigger is set so that the statistics cookies are accepted by the visitor.
You may get this error when you are testing Consent Mode in Google Tag Manager. This error is not serious and does not affect your tracking. So it does not mean that Consent Mode is not properly set up.

If you're encountering a scenario where the Cookiebot banner is not visible on your website, there are 2 primary checks you should perform:
1. Check your subscription status
The visibility of the Cookiebot banner across your website is dependent on an active subscription. If your subscription has lapsed, Cookiebot may cease to display the banner, as it's a feature included in the service. To resolve this, verify your payment status in the Cookiebot dashboard and ensure your subscription is current.
2. Verify domain registration in Cookiebot
Another common reason for the banner's absence is the domain not being registered or properly configured within the Cookiebot system. Each domain where you want the banner to appear needs to be listed in your Cookiebot account. To fix this, log in to your Cookiebot account and check that all domains are correctly added and that the settings align with your implementation requirements.
