Server Side Tracking is often perceived as complex and complicated. Despite the many benefits of SGTM, many companies are still hesitant. A shame, because implementation, using Google Tag Manager is often simpler than you think. In this article, we would like to take you through the basic implementation of GTM Server Side Tracking.
Table of Contents
But first … why GTM Server Side Tracking?
Use Google Tag Manager is the most widely used platform for managing pixels and cookies. Most marketers and developers are used to using GTM. With the introduction of Server Side Tracking, Google and the community have been working hard to enable Server Side Tracking through Google Tag Manager. As a result, more and more opportunities arise. Setting up SST is getting easier and easier, and new tags are being developed all the time, which can be installed server side. Personalizing user experiences on dynamic Web pages increased significantly.
In addition, GTM Server Side Tracking provides the ability to build on existing tagging infrastructures. This means that already developed tags can be easily adapted for server-side functionality, making the transition smooth and without losing existing data or functionality. This has made GTM Server Side Tracking the obvious choice in many scenarios for companies striving for an efficient and effective tagging strategy.
In 7 steps to a good basic setup
Every company is different. Webshops, B2B, foundations, Governments, etc. As a result, tag management needs are also different. For this article, we assumed the most complete setup. You can, of course, adapt these to your own situation.
We try to make it as easy as possible for customers, so we created a sample implementation and a free GTM Copy Paste extension for easy copying and pasting of GTM elements.
Step 1: Install Google Tag manager and create a web container
If you already have an existing GTM account and data is already being collected, you can skip this step. Otherwise, it is important to add Google Tag Manager to your website in the normal way first. That means putting a script in the head section and a script in the body section of your website.
Should you be looking for a description of this step, check out this article.
Step 2: Adding a (GA4) datalayer
This step is particularly applicable for web shops. For regular websites with basic tracking needs, this step can be skipped.
You can think of a data layer as a bridge between the website and Google Tag Manager. It is an invisible layer that organizes data in a structured way so that other software, such as GA4, can understand it. Now that we are in the transition from Universal Analytics to GA4, we also recommend implementing a GA4 data layer.
A datalayer makes all kinds of things measurable. Think sales data, product data and user data. Examples include: Which products were added to the cart, how much revenue was generated from a purchase and how many products were viewed.
A datalayer is particularly interesting for webshops (sales data, product data and user data), but to a lesser extent also for companies that generate online leads with online marketing (user data). For the latter category, a datalayer is interesting for setting up enhanced conversions.
You can develop a datalayer manually, but there are also good plugins for many platforms that will save you a lot of time:
- Woocommerce/Wordpress: TAGGRS plugin
- Magento 2: Anowave extension
- Shopify: Analizify
- Shopware: Google Analytics 4 for shopware 6
- Custom: Create your own GA4 datalayer
Step 3: Create a GA4 account
You can add a GA4 account when you go to your existing Google Analytics account. There, click on settings at the bottom left and then you will see the option to create a new GA4 account. When you go through the configuration, you get a measurement ID. You need these to install a new GA4 Google Tag in the web container. Do you already have a GA4 account? Then go to Admin –> Data Streams and click on the stream. Next, you will see the measurement ID is shown. Now go to Google Tag Manager and create a new tag. Select the Google Tags here.

When you select the Google Tag, the first thing you will be asked to do is to add a Tag ID. Add the Tag ID you just generated when creating a GA4 account here.
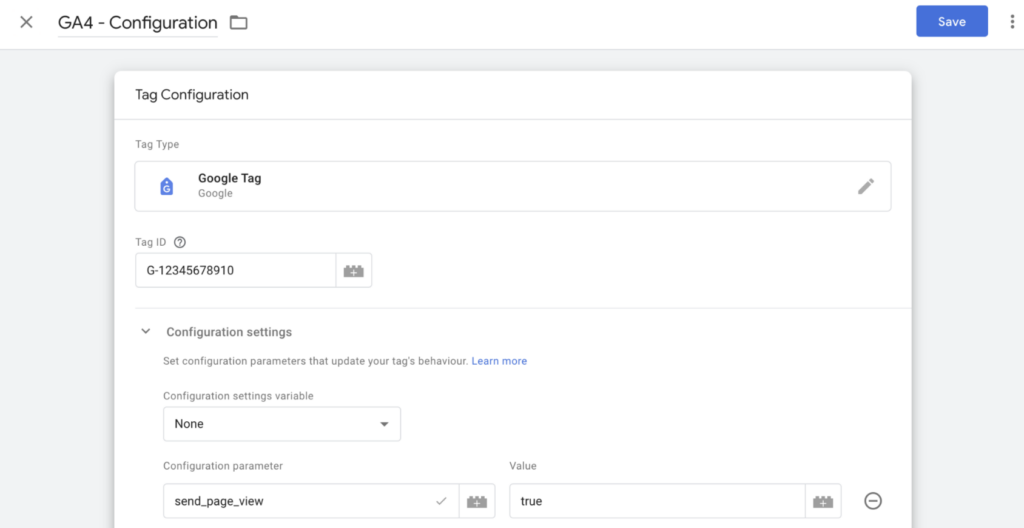
Next, under Triggers, enter “all pages. After the following steps, we return to this step for completion. Can’t figure it out? Then check out this detailed description.
Step 4: Create a server container in GTM
If you are in the GTM web container container, click on Admin. Then click on the + sign under the tab ‘container‘. There you can create a new container. You will then see this screen:
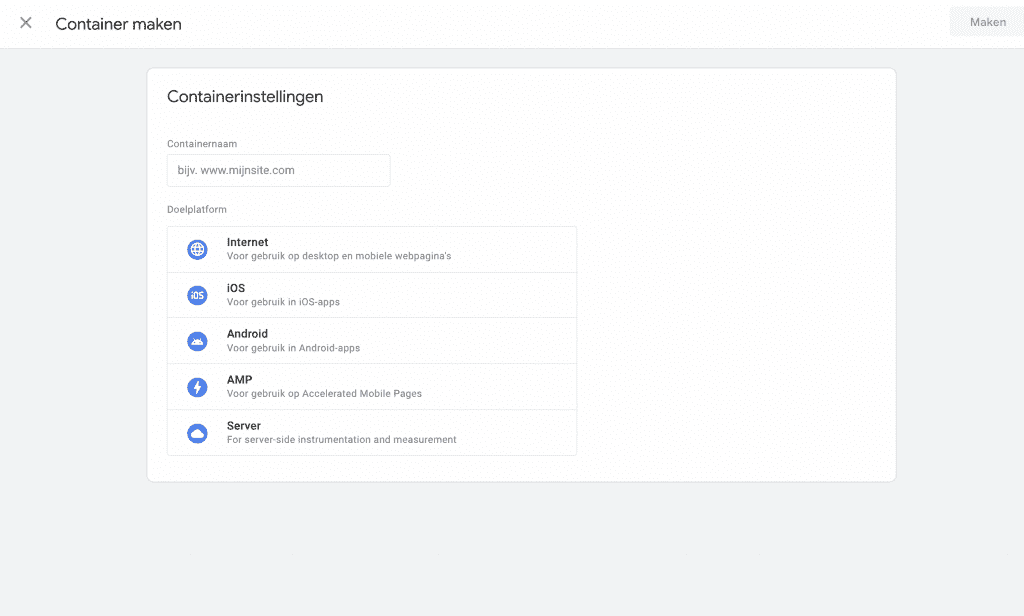
Select server here and give the container an appropriate name (your website – server side). Next, you will see this screen.
Step 5: Setting up the tag server
This is where most implementations stall, because it gets a little more technical. In fact, Google offers the ability to set up the tag server “automatically” via Google cloud. Although the name suggests that this is the easiest option, this is often not the case.
That’s why we developed TAGGRS. We handle the technical work, so you can get hands-on with Server Side Tracking. In addition, we are up to 5x cheaper than Google Cloud (€120 per month), because our hosting and server structure focuses solely on Server Side Tracking. As a result, the structure is much more efficient and you pay a fair price, starting at €25 per month. For small websites, even for free.
See how to create a container to get started with Server Side Tracking here:
TAGGRS makes setup as easy as possible. There are two technical things you need to set up to get started.
1: Creating and configuring a subdomain
For Server Side Tracking to work, you need to create a subdomain: with this you have the least risk of problems maintaining your tracking capabilities.
Domain: example.com
Subdomain: test.example.com
You do this in your website’s domain hosting environment.
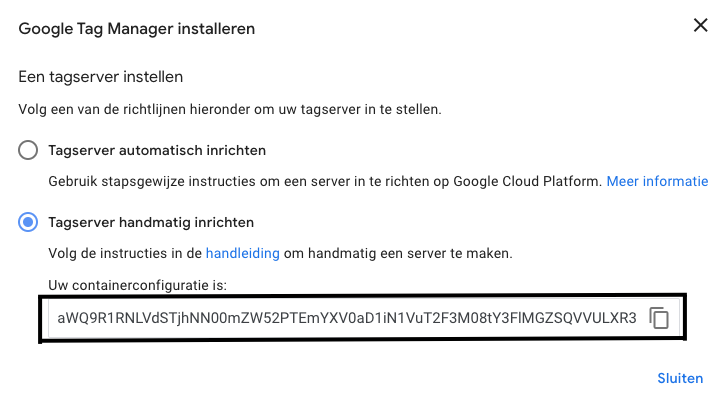
2: Adding your container configuration code
You get this code by clicking ‘set up tag server manually’ in the screenshot above.
When you add this code and configure the subdomain correctly, you can be up and running within 5 minutes. If you don’t have access to domain hosting yourself, ask the web developer. They can often easily arrange those for you.
Step 6: Use the server container URL in GTM
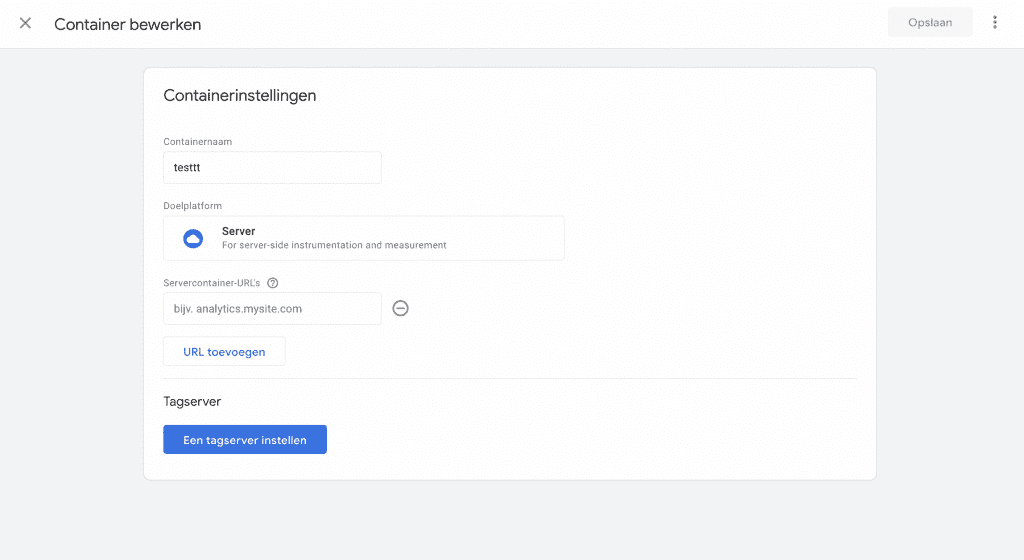
You can now use the URL of the subdomain in Google Tag Manager. This is where the data is collected. In this example, you want to enter the URL 2x.
First, at the container settings in the server container you just created in step 4. To do this, go to top left to management and under the container tab, click on “container settings.
Note: Make sure you are in the server container, not the web container. Enter the subdomain here:
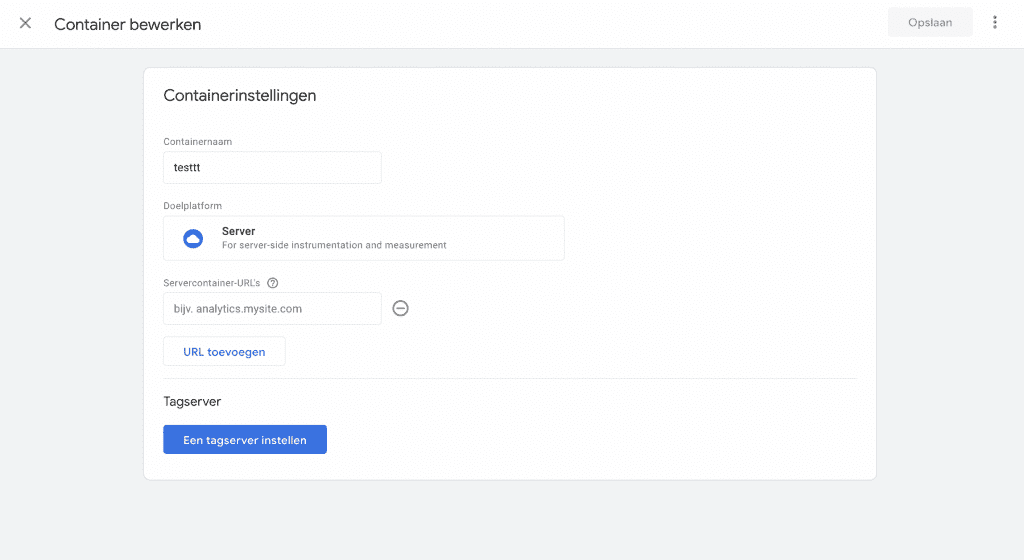
This ensures that the server can receive container data from the subdomain. So an essential step.
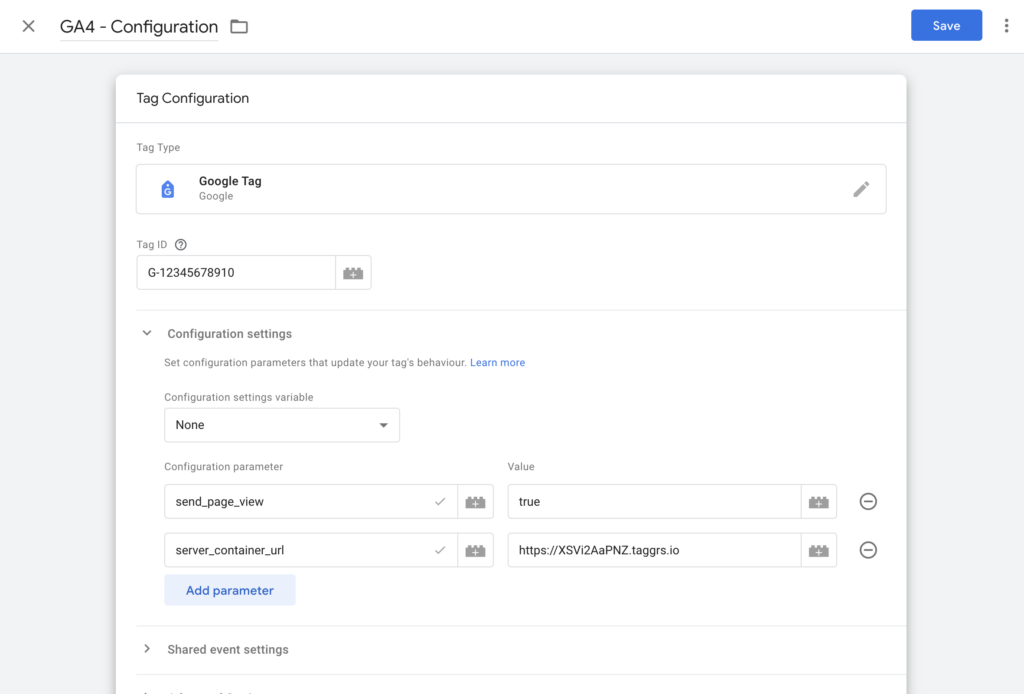
However, the subdomain is not collecting data at this time, because nothing is being sent to it yet. Therefore, we want the GA4 tag we set up in step 3 to send the data to the subdomain. So, we go back to step 3 and then fill in the following under Configuration parameter:
- send_page_view : true
- server_container_url : [subdomein]
Step 7: Testing
If everything is set up correctly, you can now get started with Server side tracking. Follow our blog to learn which tags you can all install server side and how to do so. Within the TAGGRS Software are all the configuration blogs/videos you need to successfully implement full GTM Server Side Tracking.

But before we let you loose, we want to give you one more tip: First test if data is coming in to the server container.
You do this by opening the preview mode in both the server and web container. Enter your website (not your subdomain) here and click through several pages. Next, see if GA4 (and other tags) are activated in the webcontainer. If this is the case: super, then the last step is to check if data is also coming in to the server container!
So… how to proceed?
GA4 is also called a data client. Using all the GA4 data, you can start setting tags in the server container. Consider the Facebook Conversion API, Google Ads remarketing and GA4 itself. In this blog, you were able to read how to set up. The real die hard Tracking can now begin. Good luck! Don’t know where to go next? Then check out our comprehensive Server Side Tracking Checklist!
