
Server-side Tracking Checklist: Step-by-step Implementation
TAGGRS Server-side Tracking Checklist is a free resource that has helped 15,000+ companies generate more conversions and revenue. Get your setup up and running with our step-by-step implementation guide.
Free download • Used by 15,000+ used worldwide • Suitable for both beginners and experienced users
Server-side Tracking implementation, made easy
Server-side Tracking has become essential for any serious marketing setup, but knowing where to start isn't always obvious. If you're not sure how resilient your current tracking is, our guide can help you assess that first. Once you're ready, this checklist will walk you through everything you need.
The list covers 28 tasks for an optimal setup, split into three clear sections: before you begin, basic configuration, and advanced tips. Whether you're brand new to SST or looking to tighten an existing setup, this is your step-by-step reference from start to finish.
What's included
Before you start
Get the checklist
If you're just getting started with Server-side Tracking, it's essential to lay a solid foundation. This section of the checklist is specifically designed to help you get started by setting up Server Side Tracking via TAGGRS and Google Tag Manager. We explain how to create a TAGGRS account and container, validate your subdomain and initiate data submission to your server container. Consider this section your reference point for the basic elements necessary to successfully get started with Server-side Tracking.
What you'll get with Server-side Tracking
By simply registering and following this checklist, you can immediately get started with Server-side Tracking, which allows you to:
Configuration
1. Create an Account + Container on TAGGRS
If you want to start Server-side Tracking, you need a Server-side Tracking hosting provider. The data collected through Server-side Tracking must be stored and processed somewhere. This is done on a server. A hosting provider provides you with the space on a server to store and process this data.
In the guide, we show you how to create a container on TAGGRS (Server-side Tracking hosting provider).
2. Send data to the Server Container
After you have created an account + container and made sure your subdomain is validated, it is time to send the data from the web container to the Server Container so you can send data from the website to the server for processing and analysis. You do this by adding your created subdomain to your Google Tag.
3. Implement tags
Now that the basics are in place, the next step is to set up the tags. To set up tags we will use 2 containers in Google Tag Manager. A web container (client side) (this is the type of container you are probably already using right now) and a server container (server side) that you just created.
What tags are there? Not every software has a server side solution. The way to find out if your software has a server side solution is to go to the Server Container → Tags. From there, click on "New". Then you will see a default list of Google tags. All of these are available.
We try to make it as easy as possible for customers, which is why we have created a TAGGRS template gallery, where you can access and download free preset GTM templates designed by our experts. All templates are available right inside your TAGGRS Dashboard, ready to use and fully customizable. Furthermore, we offer a free GTM Copy Paste extension for easy copying and pasting of GTM elements.
4. Check that the Event IDs match
Check that the Event ID in the client container events matches that in the server events. Use the Google Tag Manager debug mode to do this.
This is only necessary for Tags that require Event Deduplication, such as with Facebook. We always indicate in our tutorials if you need to apply this.
You go into both client-side and server-side preview mode in Google Tag Manager.
- Client side: go to container loaded
- Server side: go to pageview
Check here if both the Event ID of the client side matches that of the server side.
5. Console Error Messages
Check in the website console that you have no error messages. test your Server-side Tracking setup. When debugging in GTM, you need to open both preview mode in the web container and in the server container.
6. Test mode
Use GA4/META's test mode to verify that the data is coming through correctly and in the case of META is deduplicated.
Measure the impact of Server-side Tracking
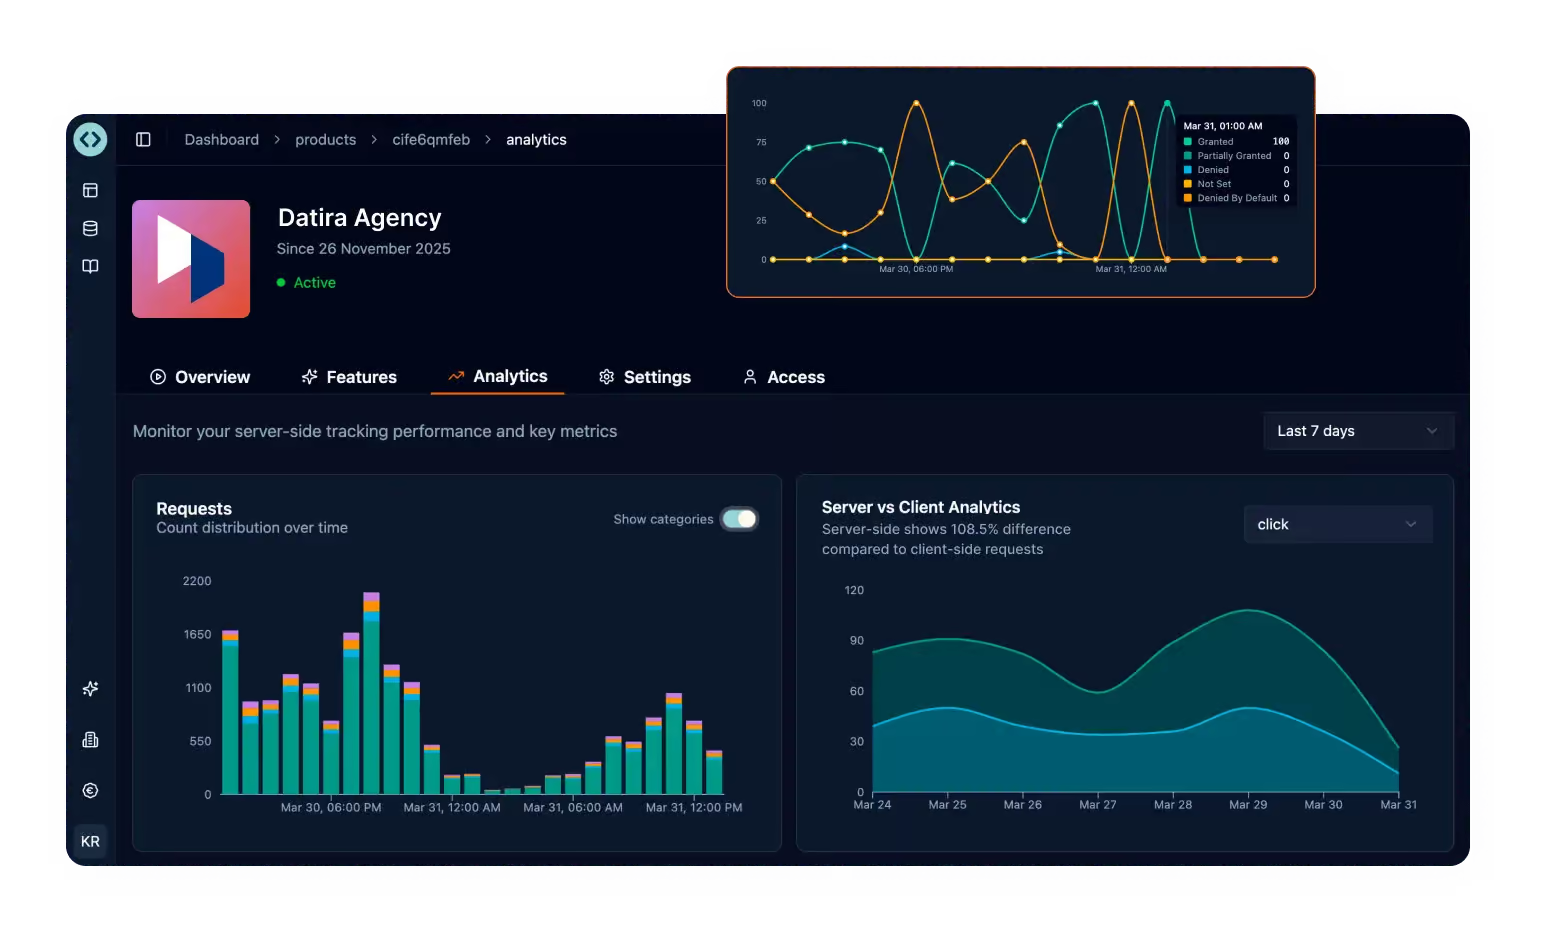
One of the most frequently asked questions we get is "How does Server-side Tracking impact my business?".
At TAGGRS, we understand the importance of this question, which is why we developed the TAGGRS analytics dashboard. Setting it up is simple and can be done by adding two tracking tags. Add the first tag to the Web container (client side) and the second tag to the Server Container (server side). After adding these, the tool will automatically start collecting and analyzing data, giving you a clear and detailed understanding of the impact of Server-side Tracking.
See it for yourself — create a free account and get your first insights today: